Most cable taping defects can be traced to an unstable relationship between tape tension, tape angle, cable speed, taping-head speed and the geometry of the incoming cable core.
Wrinkles usually indicate that the tape is not lying smoothly against the cable. Gaps often point to incorrect pitch or unstable synchronization. Frequent tape breakage is commonly associated with excessive tension, damaged tape edges or abrupt machine movement, while loose wrapping usually means that insufficient force is keeping the tape against the cable.
The difficult part is that these defects are connected.
Increasing tape tension may remove a wrinkle but create tape breakage. Increasing taping-head speed may close a gap but produce excessive overlap. Reducing line speed may improve wrapping temporarily while hiding an unstable tension-control system.
For cable manufacturers, troubleshooting should therefore follow a controlled sequence rather than relying on repeated trial-and-error adjustments.
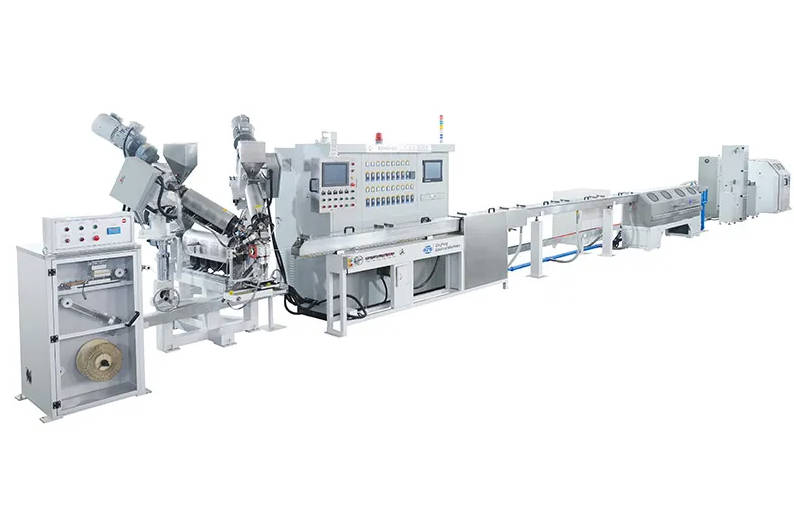
QingFeng SFS develops wire and cable manufacturing equipment for cable production processes where tension, line speed and material handling must work as one coordinated system.
Before Changing Any Setting, Record These Five Things
When a cable taping problem appears, operators often begin changing several parameters immediately.
This makes troubleshooting slower because the original process condition is lost.
Before touching the settings, record:
- Tape tension
- Cable line speed
- Taping-head rotational speed
- Tape width and current roll diameter
- Actual overlap or gap on the finished cable
Also note where the defect occurs.
Does it appear:
- Immediately after startup?
- Only at high speed?
- As the tape roll becomes smaller?
- During acceleration?
- During deceleration?
- At random locations?
- After changing tape batches?
- Only with one cable diameter?
This information is often more useful than the appearance of the defect itself.
A defect that appears only near the end of a tape roll usually points to a different root cause from the same defect that exists from the first meter of production.
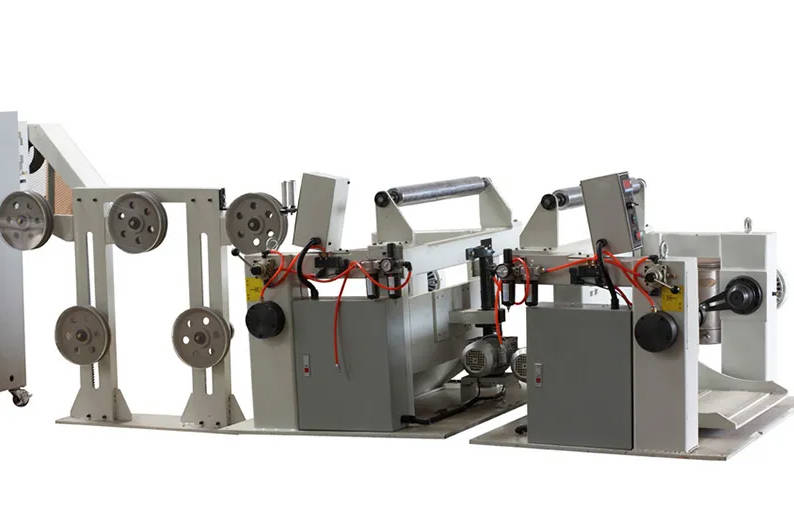
QingFeng SFS describes dynamic dancers, load-cell tension checking, automatic full-to-empty bobbin tension adjustment, pulling-speed control and synchronization monitoring among the available control functions used in its taping systems.
Fast Diagnostic Table: Start Here
| What You See | Check First | Common Root Causes | Avoid Doing First |
| Wrinkles | Tape angle and tension | Tape too wide, low tension, poor alignment, unstable cable | Do not immediately increase tension heavily |
| Gaps | Pitch and speed synchronization | Head too slow, cable too fast, tape slipping, low overlap setting | Do not simply increase tape consumption |
| Tape breakage | Tension and tape path | Excess tension, sharp guides, damaged edge, sudden acceleration | Do not automatically reduce production speed permanently |
| Loose wrapping | Tape tension and forming point | Low tension, poor compaction, cable movement | Do not tighten take-up tension to compensate |
| Changing overlap | Speed and tension trends | Tape stretching, drive fluctuation, roll-diameter effect | Do not judge from HMI values alone |
| Folded tape edge | Entry angle and guidance | Incorrect guide position, excessive width, cable vibration | Do not keep increasing overlap |
| Repeated defect at same pitch | Rotating component | Guide, spool, head imbalance or periodic tension fluctuation | Do not treat it as random material variation |
The following sections show how to investigate each major defect without creating a second problem.
Defect 1: Wrinkles
A tape wrinkle occurs when part of the tape cannot conform smoothly to the cable surface before the next section is wrapped over it.
Wrinkles can appear as:
- Small transverse folds
- Long diagonal creases
- Folded tape edges
- Local bubbles
- Corrugated surfaces
- Raised areas under subsequent layers
They are not only cosmetic.
Depending on the cable function, wrinkles can affect:
- Shielding geometry
- Finished diameter
- Jacket surface
- Dielectric consistency
- Subsequent extrusion
- Layer adhesion
- Mechanical flexibility
First Check: Is the Tape Too Wide for the Cable?
Tape width must match cable diameter and wrapping geometry.
Using a very wide tape around a small cable forces the tape to change direction sharply as it follows the helical path. The tape may no longer lie flat, creating folds or open areas. Cable-wrapping guidance similarly identifies excessive tape width relative to cable diameter as a cause of wrinkles and gaps.
Before changing machine settings, compare:
- Cable diameter
- Tape width
- Tape thickness
- Wrapping angle
- Required overlap
If the problem appears only on the smallest cable size while larger products run normally, tape width or machine geometry should be investigated before blaming the tension controller.
Second Check: Is Tape Tension Too Low?
Tape needs enough tension to remain flat against the cable.
When tension is too low:
- Tape can flutter before the forming point
- Edges may fold
- The layer can shift laterally
- Wrinkles become trapped under the next wrap
Increase tension gradually while watching the tape immediately before it contacts the cable.
Do not jump from low tension directly to a much higher value. Some thin films, foils and mica tapes have a relatively narrow operating window.
Third Check: Is the Forming Point Stable?
Watch the exact location where the tape first contacts the cable.
That point should remain relatively stable.
If it moves forward and backward while the machine runs, investigate:
- Cable vibration
- Unstable tension
- Guide-wheel movement
- Tape-guide position
- Taping-head vibration
- Puller-speed fluctuation
A machine that displays stable RPM can still produce wrinkles if the cable itself is moving.
Wrinkle Troubleshooting Sequence
- Inspect tape width and roll quality
- Reduce machine speed temporarily
- Observe the tape before contact
- Correct the guide angle
- Increase tension slightly
- Confirm cable centering
- Return gradually to production speed
If the wrinkle disappears at low speed but returns consistently above a particular speed, the problem may involve dynamic tension response or vibration rather than the nominal tension setting.
Defect 2: Gaps Between Tape Turns
Tape gaps occur when adjacent wraps do not provide the intended coverage.
For shielding, insulation, fire-resistant or dielectric applications, unintended gaps can directly affect cable performance.
A tape gap is primarily a geometry and synchronization problem: cable speed, taping-head speed, tape width and wrapping angle are no longer producing the required pitch.
Think in Terms of Pitch, Not Just Overlap Percentage
The tape follows a helix around the cable.
If the cable moves faster while head speed remains unchanged, the pitch becomes longer.
The tape turns move farther apart.
If head speed increases while line speed stays constant, pitch becomes shorter and overlap increases.
Therefore, sudden gaps can occur when:
- Cable speed increases
- Taping-head speed falls
- Pulling equipment slips
- Tape stretches
- Cable diameter changes
- A drive loses synchronization
This is why simply entering “50% overlap” into an HMI does not prove the finished cable actually has 50% overlap.
Measure the product.
Is the Gap Constant or Intermittent?
This distinction is useful.
Constant Gap
If the gap stays approximately the same throughout the reel, check:
- Recipe setting
- Tape width
- Pitch calculation
- Head speed
- Line speed
- Cable diameter entered in the control system
This often suggests a setup problem.
Intermittent Gap
If gaps appear and disappear, investigate:
- Drive synchronization
- Tape slip
- Puller slip
- Cable vibration
- Tape tension
- Changing roll diameter
- Mechanical backlash
An intermittent gap usually indicates process instability rather than a single incorrect setpoint.
Check the Incoming Cable Core
A cable core that changes diameter or shape can also change effective tape coverage.
For example:
- Loose stranded elements
- Irregular bunching
- Oval cable cores
- Protruding wires
- Unstable twisted pairs
can make tape geometry fluctuate even when the taping machine itself is operating consistently.
When the problem clearly originates before the taping head, inspect the upstream bunching and twisting process rather than continuously compensating with the taping machine.
Defect 3: Tape Breakage
Tape breakage is one of the most expensive taping defects because it normally interrupts continuous production.
It can create:
- Machine downtime
- Scrap
- Manual tape joints
- Incomplete coverage
- Additional inspection
- Reduced operator confidence at high speed
When tape repeatedly breaks, first determine whether the tape is being pulled beyond its mechanical tolerance or being physically damaged somewhere along the tape path.
Inspect the Broken Edge
The break itself provides clues.
Clean Tensile Break
If the tape appears to have been pulled apart, investigate:
- Excessive tension
- Sudden acceleration
- Incorrect brake setting
- Poor dancer response
- Tape roll inertia
Damaged or Frayed Edge Before Break
Check:
- Guide edges
- Ceramic guides
- Spool flange
- Misalignment
- Contaminated rollers
- Tape slitting quality
A small edge defect can propagate across the tape under tension.
Repeated Break at the Same Machine Position
This strongly suggests a machine-contact issue.
Inspect every surface touching the tape.
Watch What Happens During Acceleration
A process may run perfectly at constant speed but break tape during startup.
The reason is dynamic tension.
A tape roll has inertia. The machine must accelerate that roll while simultaneously pulling tape into the wrapping point.
If the tension controller responds too slowly, a short tension spike can occur.
This is especially important with:
- Thin foil
- Mica tape
- Narrow tapes
- Brittle composite tapes
- Large or heavy tape rolls
Mica-tape handling guidance, for example, emphasizes matching tape width, wrapping tension, angle and speed to avoid breakage and maintain a smooth wrapped surface.
If Breakage Happens Only at High Speed
Do not immediately conclude that the material is unsuitable.
Investigate:
- Head vibration
- Tape-roll balance
- Dynamic dancer response
- Guide friction
- Acceleration profile
- Motor synchronization
- Tape-roll quality
Reducing line speed may temporarily stop the defect, but the objective is to identify why the stable operating window ends at that speed.
Defect 4: Loose Wrapping
Loose wrapping is sometimes harder to notice than a gap or break.
The cable can appear covered while the tape layer is not mechanically stable.
Signs include:
- Tape moving when touched
- Layer shifting on the reel
- Tape edge lifting
- Changing finished diameter
- Wrapping opening during bending
- Layer displacement before extrusion
Start With Tension—but Do Not Stop There
Low tape tension is a common cause.
However, if increasing tension does not solve the problem, check the forming point and cable stability.
A tape can have adequate measured tension while still arriving at the cable at an ineffective angle.
Investigate:
- Tape-entry angle
- Guide position
- Cable centering
- Compaction
- Puller tension
- Cable surface friction
- Tape backing properties
Check the Cable Surface
Some cable surfaces provide less friction than others.
Smooth polymer insulation, foil-covered cores or certain film surfaces can allow the newly applied tape to move before the next turn stabilizes it.
Depending on the process, solutions may include:
- Optimizing wrapping angle
- Adjusting overlap
- Improving tension stability
- Adding controlled compaction
- Using heating where the tape system requires bonding
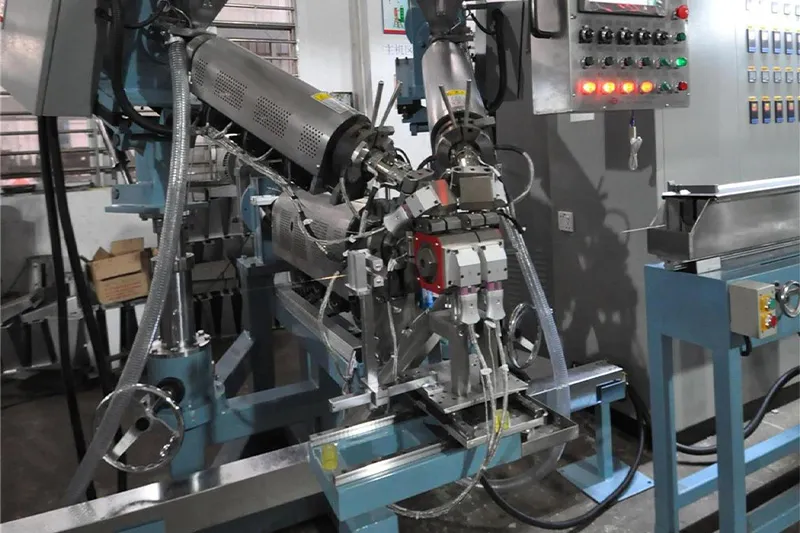
QingFeng SFS lists compacting units and optional heating systems within its taping equipment architecture for applications where tape adhesion or layer stabilization is required. (dgqfmachine.com)
One Defect Can Cause the Next
Cable taping problems should not be treated as isolated symptoms.
Consider this sequence:
Low tension → tape flutter → wrinkle → changing effective width → unstable overlap → local gap.
Or:
High tension → tape stretching → narrower effective tape width → reduced overlap → tape breakage.
Another common sequence is:
Unstable cable pulling → changing line speed → changing pitch → overlap variation → loose or excessive wrapping.
This is why blindly correcting the visible defect can create another one.
Root-Cause Interaction Map
| Adjustment | Possible Improvement | Possible Side Effect |
| Increase tape tension | Reduces loose wrapping and some wrinkles | Can stretch or break tape |
| Reduce tape tension | Reduces breakage | Can create wrinkles and loose wrapping |
| Increase head speed | Closes gaps | Increases overlap, vibration and tape consumption |
| Reduce cable speed | Improves process stability | Reduces output and may hide synchronization problems |
| Increase overlap | Reduces gap risk | Raises material consumption and finished diameter |
| Use wider tape | Reduces number of wraps | Can create wrinkles on small cable diameters |
| Increase compaction | Stabilizes tape layer | Can deform soft cable cores |
| Increase take-up tension | Improves reel stability | Can stretch cable or shift wrapped layers |
Change one major variable at a time and record the result. Otherwise the production team loses the relationship between cause and effect.
A 10-Minute Troubleshooting Routine
When a taping defect suddenly appears during a previously stable production run, use this sequence.
Step 1: Stop and Inspect the Tape
Check:
- Roll damage
- Edge damage
- Wrong width
- Splice
- Contamination
- Incorrect tape batch
If the problem started exactly after a new tape roll was installed, compare the old and new roll before adjusting the machine.
Step 2: Inspect the Cable Core
Look for:
- Diameter change
- Ovality
- Loose conductor
- Surface contamination
- Twisting instability
Step 3: Reduce Speed
Run at a controlled low speed.
If the defect remains unchanged, investigate geometry or material first.
If it disappears, dynamic control or vibration becomes more likely.
Step 4: Observe the Tape Path
Watch from spool to cable.
Look for:
- Flutter
- Sudden dancer movement
- Tape rubbing against a flange
- Lateral wandering
- Edge folding
Step 5: Check Actual Tension
Do not rely only on the controller percentage.
Where a load cell or tension measurement is available, compare actual values through:
- Startup
- Continuous production
- Acceleration
- Full roll
- Half roll
- Near-empty roll
Step 6: Verify Speed Synchronization
Compare taping-head speed and cable line speed.
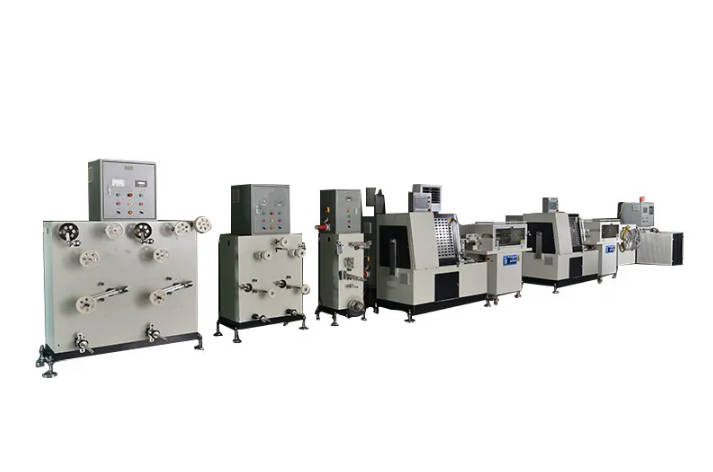
QingFeng SFS lists capstan or caterpillar pulling systems together with synchronization monitoring and threshold detection for abnormal speed synchronization or wire breakage in its taping equipment design.
Step 7: Measure the Finished Cable
Measure:
- Actual overlap
- Finished diameter
- Wrapping pitch
- Surface condition
Do not conclude that the problem is solved just because the machine display looks stable.
Material Problem or Machine Problem?
A useful diagnostic question is:
Does the defect follow the material, the product or the machine?
Suspect the Tape When:
- Only one batch fails
- Tape edges are visibly inconsistent
- Splices repeatedly fail
- Roll winding is uneven
- Different tape material runs normally
Suspect the Cable Core When:
- Only one conductor or cable structure has defects
- Diameter changes before the taping head
- The cable oscillates
- Loose upstream strands are visible
Suspect the Machine When:
- Several tape batches show the same defect
- The defect appears at the same speed
- Tension changes with tape-roll diameter
- A repeating defect matches head rotation
- Problems occur during acceleration
- Guides visibly move or vibrate
This distinction prevents production teams from compensating for poor incoming material by creating unstable machine settings.
What Equipment Functions Help Prevent Repeat Defects?
For manufacturers buying or upgrading a cable taping machine, the goal should not simply be more RPM.
The control system should address the failure modes seen in production.
| Production Risk | Useful Equipment Function |
| Tape tension changes as roll empties | Automatic full-to-empty tension compensation |
| Wrinkles from tension fluctuation | Dynamic dancer or direct tension control |
| Undetected tape break | Tape-break detection |
| Changing overlap | Synchronized head and cable-speed control |
| Cable vibration | Stable payoff, guides and pulling system |
| Multiple layers drifting | Independent control for each taping head |
| Process instability at speed changes | Coordinated acceleration/deceleration |
| Repeated operator setup errors | PLC product recipes |
| Difficult root-cause analysis | Trend and alarm recording |
| Surface or dimensional defects | Online vision or diameter measurement |
QingFeng SFS currently describes taping systems using dynamic dancers, load cells, multiple synchronized heads, pulling systems and inline inspection options. (dgqfmachine.com)
When evaluating broader line integration, manufacturers can also review QingFeng SFS cable machinery capabilities.
What to Test Before Accepting a Cable Taping Machine
A factory acceptance test should intentionally reproduce conditions that commonly cause defects.
Do not only demonstrate one stable speed with a full tape roll.
Test:
- Startup at low speed
- Acceleration to production speed
- Continuous high-speed operation
- Deceleration
- Full tape roll
- Partially used roll
- Small remaining roll diameter
- Tape-break detection
- Different cable diameters
- Different tape widths where required
- Multi-head synchronization
- Actual overlap measurement
- Tape surface inspection
- Reel winding quality
The objective is not merely to prove that the taping head can rotate.
A meaningful machine trial should demonstrate stable tape coverage through the operating conditions that normally create wrinkles, gaps, breakage and loose wrapping.
Frequently Asked Questions
What causes wrinkles in cable taping?
Cable tape wrinkles are commonly caused by incorrect tape width, insufficient tension, poor tape-entry angle, unstable cable positioning or taping-head vibration. Check tape geometry and guidance before making large tension adjustments.
Why are there gaps in my cable tape wrapping?
Tape gaps usually result from excessive cable speed relative to taping-head speed, incorrect pitch settings, tape stretching, puller slip or unstable cable diameter.
Why does cable tape keep breaking during production?
Common causes include excessive tape tension, damaged tape edges, sharp guides, heavy tape-roll inertia and tension spikes during acceleration.
How do you fix loose cable taping?
Check actual tape tension, tape-entry angle, forming point and cable stability. Increasing tension may help, but excessive tension can create stretching or tape breakage.
Can tape width cause cable taping defects?
Yes. Tape that is too wide for the cable diameter and wrapping angle may wrinkle or fail to conform smoothly, while excessively narrow tape may require more rotations and increase the risk of coverage variation.
Why does tape overlap change as the roll becomes smaller?
Changing roll diameter alters rotating inertia and can change tape tension if the control system does not compensate properly. This can affect tape stretch, forming position and actual overlap.
Does reducing cable taping speed solve tape breakage?
It may reduce breakage temporarily, but it does not necessarily remove the underlying cause. The actual problem may be tension response, tape guidance, vibration or acceleration settings.
How can a taping machine maintain consistent overlap?
The machine must coordinate cable line speed and taping-head rotation while maintaining stable tape tension and cable geometry. Finished cable should still be measured because displayed settings alone do not confirm actual coverage.
What should be checked when cable taping defects appear only at high speed?
Check head vibration, dynamic tension response, tape-roll balance, cable pulling stability and synchronization between the taping head and line speed.